So you have an NPC (Non-Player Character) in a game that you want to maneuver around a scene but there are obstacles in the way, don't worry there are ways around this. Jokes aside what you are looking for is a means to have your NPC avoid obstacles. In this blog post, I hope to talk about my approach to obstacle avoidance (It might be a little Unity-centric since that is what I used) and how you can do it too! (amazing)
The example of obstacle avoidance that I implemented
As you can see (in the video above) it's not perfect but it does a good job of visualizing the main points I want to make.
To start off I needed to create an NPC to maneuver the scene, I used a basic triangle sprite since it's a shape with some nice visual direction. Next, I needed some obstacles to avoid, depending on the tools you have, circles can be used as obstacles since they are easy to use for hit detection, but thanks to unity I was able to put whatever I wanted into the scene there as long as I gave it a collider. With these basic elements in place, we are able to start working on obstacle avoidance (I'm going to break this into parts)
Part 1 - Detection
In order to avoid obstacles, your NPC needs to see them coming. There are a multitude of methods for doing this but a common one that I used is raycasting. This creates a line/ray/laser from a point (in my case the triangle) and shoots it off in a direction (in my case in front of the triangle). When these rays hit a target you can do all sorts of stuff, you could damage an enemy, start pursuing a target, or start a dialogue, the possibilities are endless. I visualized these rays using red lines and had them stop at a set distance since I only wanted to collect info and avoid obstacles that were blocking the character.
The NPC and the ray cast visualized
Raycast are pretty good for this sort of application but there are some issues with this method. starting off since a raycast is hypothetically infinitely thin they can miss a lot of things that might be just off to the side of the ray. This is one of the reasons that one might use multiple rays to detect a potential obstacle. I made my example so that I could use as many as I want but I kept it to three since it gets visually cluttered if I use more than that. One thing to keep in mind if you have multiple raycast is the range (in terms of angle) at which you cast your rays. You can have 360° coverage of your character but do you really need to worry about an obstacle behind you? Sometimes, but usually not, so I kept mine to a 90° spread. This angle works for the obstacles but is too wide to allow the NPC to avoid smaller things like other NPCs (one fix to this could be more raycasts to fill the gaps).
Part 1.5 - Interpretation
In my opinion, how you interpret the information gathered from your detection step could be a part of the detection step, but I think its also important to the next step (action/avoidance) since you can alter how you interpret the information to get different (hopefully desired) results. To help explain the rationale behind this I am going to show some of the behind the scenes visualization from my example.
Some of the debugging visuals that you would never see in the game view
A raycast in Unity allows you to see where the ray hit (as visualized by the sort of hard to see X on the circle) as well as the normal of the collider at the hit point (the normal is given as a vector that's perpendicular to the surface that was hit). I could have just taken the normal and applied it as a force to my character in order to avoid the obstacle, but I thought it would be better if instead of using the normal of the surface that was detected, to take the reflection of the raycast on the surface and use that (it is shown as the green line in the image above). I did this because I wanted the character to have a more natural flow through the scene when it ran almost head-first into an obstacle. Unity has some tools built in that take an incoming vector and a normal and return an outgoing reflected vector so this was pretty easy to do.
By doing this I was able to change the way I interpreted the information in order to change the behavior of my obstacle avoidance (nice!) but there were some problems with this as well. As you can see in the image above if the detection is from a sharp angle then you can get a reflection that actually adds an accelerating force to the character (as shown with the blue line). This produced some unintended results but didn't ruin the project overall.
(one of the unintended side effects of this is that multiple NPCs will almost race each other if they lock each other into their raycasts)
Part 2 - Action/Avoidance
This step is the step where you actually start applying forces/moving your character. It could be as basic as taking the information from the interpretation step and applying it as a force to the character but this is also the part where you would want to insert some tweakable variables that you can change in order to get the behavior you want. As mentioned before I was having a problem with my NPCs inadvertently accelerating beyond their intended max speed, so this was the step that allowed me to create a variable that would allow me to artificially increase the amount of "avoidance force" that was applied to the character. This prevented them from running into walls but resulted in some stiff movements at times. The point that I want to get across is that you can tweak this step/part and this can be quite tricky depending on how in depth/far you are willing to take it.
(The red lines are the raycasts, the green lines are the reflections of the raycast and the blue lines are visual representations of the force that's being applied to the character. there are also small X's that appear where the rays hit but they are sort of hard to see)
I hope that this was informative to some extent and feel free to comment with any questions you might have (I'll try my best to answer them in a timely manner) and I'll try to either update this post or link a newer one if need be (better/newer info)
Influence Maps! An influence map is a method/tool used to modify (influence) the behaviors of AI in games (usually). There is no one way to use or create an influence map so the goal of this blog post is to not necessarily give you the "ULTIMATE GUIDE TO INFLUENCE MAPS!!!" but a good summary/jumping-off point that you could potentially use in whatever game you are making. I am going to break this post into a few parts so feel free to jump around if you want Part 1 - What is an influence map? Part 2 - What's it good for/Where might you use it? Part 3 - My implementation Part 4 - FIN (the end) Part 1 - What is an Influence Map? As the name implies an influence map is the mapping of various influences that will affect some sort of actor in a game. An example that I was given was a heatmap that showed enemy locations in a game. (Feel free to skip this next part if you know what a heat map is) For those that don't know a heatmap is the visual rep...
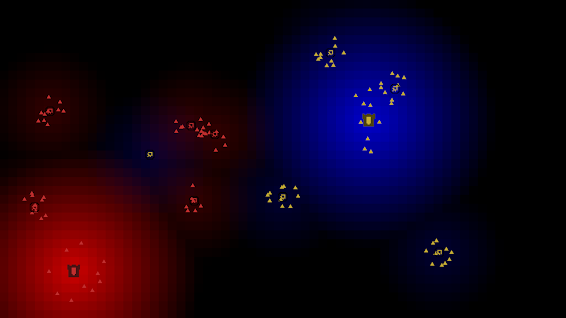
Obstacle Avoidance! (again) but now in 3D with flocking behaviors "They say everything in life comes full circle eventually" -they I didn't intend to revisit obstacle avoidance again so soon, but this time, it's different. The primary focus of my latest assignment was to implement flocking and obstacle avoidance (a completely different beast). Luckily for me, I had done flocking before (in 2D), and I have also done obstacle avoidance before (also in 2D, check out my blog post on it 😉). I thought the primary problem I was going to have was combining both of these into one behavior. After some thinking however, The solution I went with was pretty simple (I'll talk about that later). In order to spice things up some more, I decided to use this project as an opportunity to implement both of these behaviors in 3D and sink my toes into some of the nifty tools that Unity had to offer (there are so many tools out there that I still don't even know about). ...
Flow Fields! Flow fields are a method/data structure for pathfinding with AI that takes what would usually be the job of many independent actors and turns it into a one-time gig that everyone can take advantage of (depending on how you implement it). I am going to talk about this subject under the assumption that you have a basic understanding of pathfinding (so if you have no clue then I suggest you google things like Dijkstra's algorithm and A* to get an idea of the methods/terms used). I want to start off by talking about what a flow field is, its advantages and its shortcomings. This won't be an in-depth dive into flow fields, just a surface-level analysis based on what I can see/understand. I do want to mention though that all of this can change based on how you implement your flow field. This is the flow field example that I made for this blog post. It shows the "units" pathing to a target in a basic 2D environment that I generated using Unity's b...


Comments
Post a Comment