Game AI - Influence Maps!
Influence Maps!
An influence map is a method/tool used to modify (influence) the behaviors of AI in games (usually). There is no one way to use or create an influence map so the goal of this blog post is to not necessarily give you the "ULTIMATE GUIDE TO INFLUENCE MAPS!!!" but a good summary/jumping-off point that you could potentially use in whatever game you are making.
I am going to break this post into a few parts so feel free to jump around if you want
- Part 1 - What is an influence map?
- Part 2 - What's it good for/Where might you use it?
- Part 3 - My implementation
- Part 4 - FIN (the end)
Part 1 - What is an Influence Map?
As the name implies an influence map is the mapping of various influences that will affect some sort of actor in a game. An example that I was given was a heatmap that showed enemy locations in a game.
(Feel free to skip this next part if you know what a heat map is)
For those that don't know a heatmap is the visual representation of values throughout a space where (depending on the type of data) you can have hot spots that can represent high values or even cold spots that might represent a low value. These values could be anything from the number of deaths that occur in an area to the amount of time people spend doing various actions. Heatmaps in this sense (in games) are usually used as a statistic to analyze different aspects of gameplay that designers/developers might want to tweak in order to change the game. An example of this could be a corridor in an FPS game where a lot of people are dying at one end but not the other, The devs could see this on a heat map and decide to put some cover where people are dying in order to increase survivability. Another solution could be to block the line of sight from the shooter's perspective. The main point I want to make though is that a heatmap is a mapped-out representation of values that can be used for whatever you can think of (in the case of this post, AI).
 |
| Example of the "heat map" I implemented for my project Red = Team 1 tower/camp influence Blue = Team 2 tower/camp influence |
Where an influence map would come into play is using the heatmap of enemy locations (more enemies in a location = higher values) to affect the behavior of AI. This could be as simple as avoiding the hot spots or even creating a heatmap of friendly locations and sticking to those. The data you use to influence your AI doesn't need to come from a heat map either, it can be a map of different types of terrain for example, as long as it's some sort of map that changes how an AI acts at a given space.
Part 2 - What's it good for/Where would you use it?
There is no set-in-stone application for an influence map, every instance of it could be replaced with another technique/method, but I would say that it shines in cases where you have easy access to mappable data that you want to influence your AI's. The enemy heat map example is a good one because it's relatively easy to collect location data on various units, and in that scenario, it made sense to use it to influence the other team's actions. It can be quite a versatile tool to have at your disposal since it all depends on how you use/create your maps, you can use it to accentuate/compliment other AI methods and create something worth more than the sum of its parts.
One example of where you might not want to use an influence map is when you don't have enough data/variables/things to warrant "mapping" it. If you only have one "thing" to keep track of/influence your AI's, you might not want to bother creating a map for it since the individuals using that data might be able to keep track of it themselves. There are a lot of cases where you might not want to use influence maps but I hesitate to even mention them because, in the end, it all comes down to appropriate application. you might have a case where it's easier/makes more sense to use an influence map for some singular form of data because it makes your AI more modular.
Part 3 - My implementation
They say that some of the best things are built on the shoulders of giants. So I decided to take their advice and build upon my own shoulders using the work I did on my last game AI project with flow fields (see that here for more info). I'm not gonna lie I started tweaking that project beforehand knowing that I had this project in the near future. This ended up creating some issues but Ill explain those later
As you can see it looks just like my flow field project with some Lil towers and weird circles, but the real difference is underneath the hood. Behind the scenes, I created a heat map based on the locations of each team's towers, and I'm using that to influence the flow field for each team. This is where one of the downsides of using the bones from my last project come into play, The methods I used for creating my flow fields were already sort of complex so the visible effect the influence map had on the gameplay is seemingly minimal when compared to the actions the units take to navigate the flow field. You can notice it at times with the little seemingly flank routes the units sometimes take in order to get to the enemy team's castle, but beyond that it's hard to spy the difference (it would have had more of an impact on a flat/less complex map).
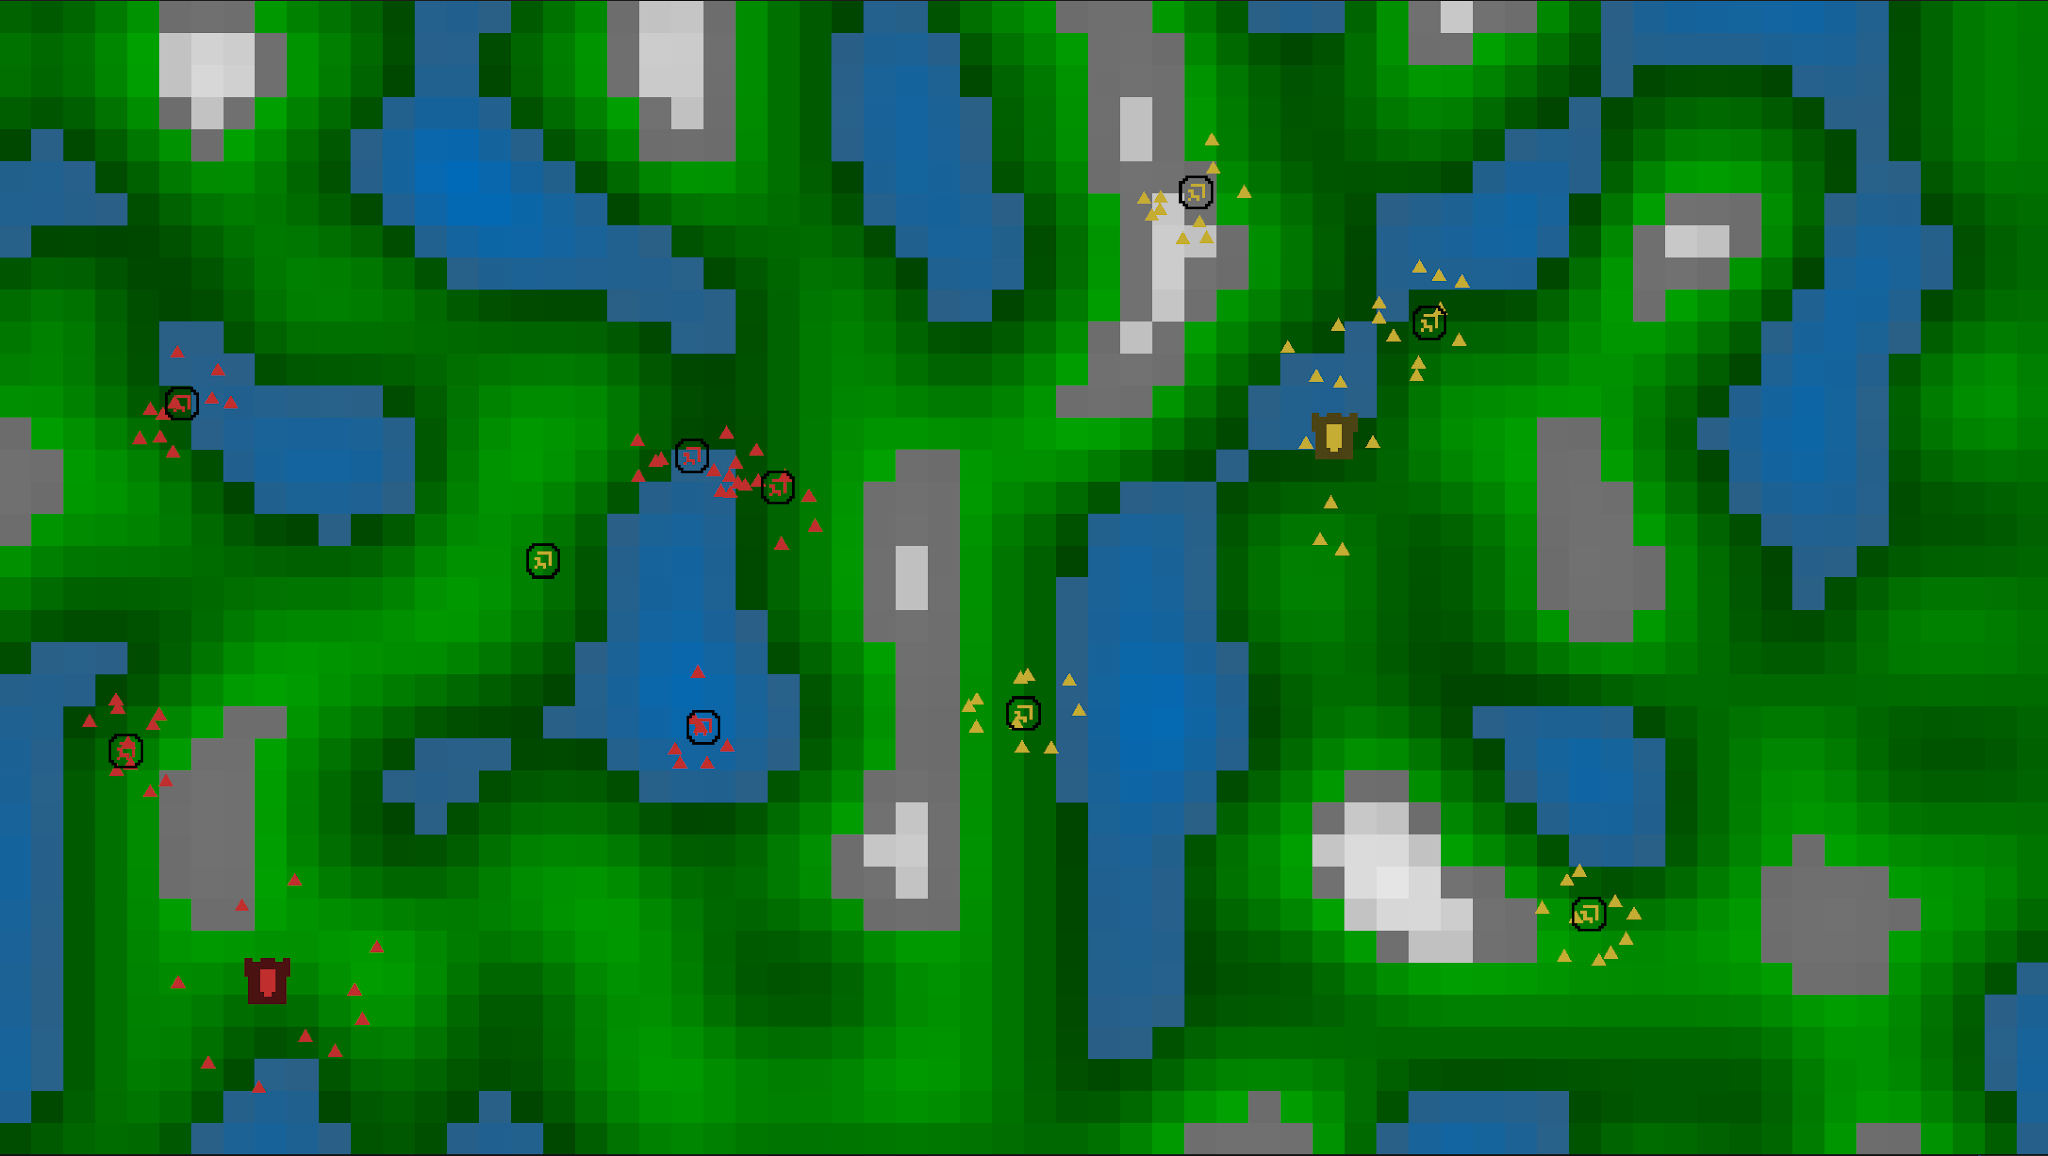 |
| The map without the heat |
 |
| Team 1 Heat Map (Effects team 2) |
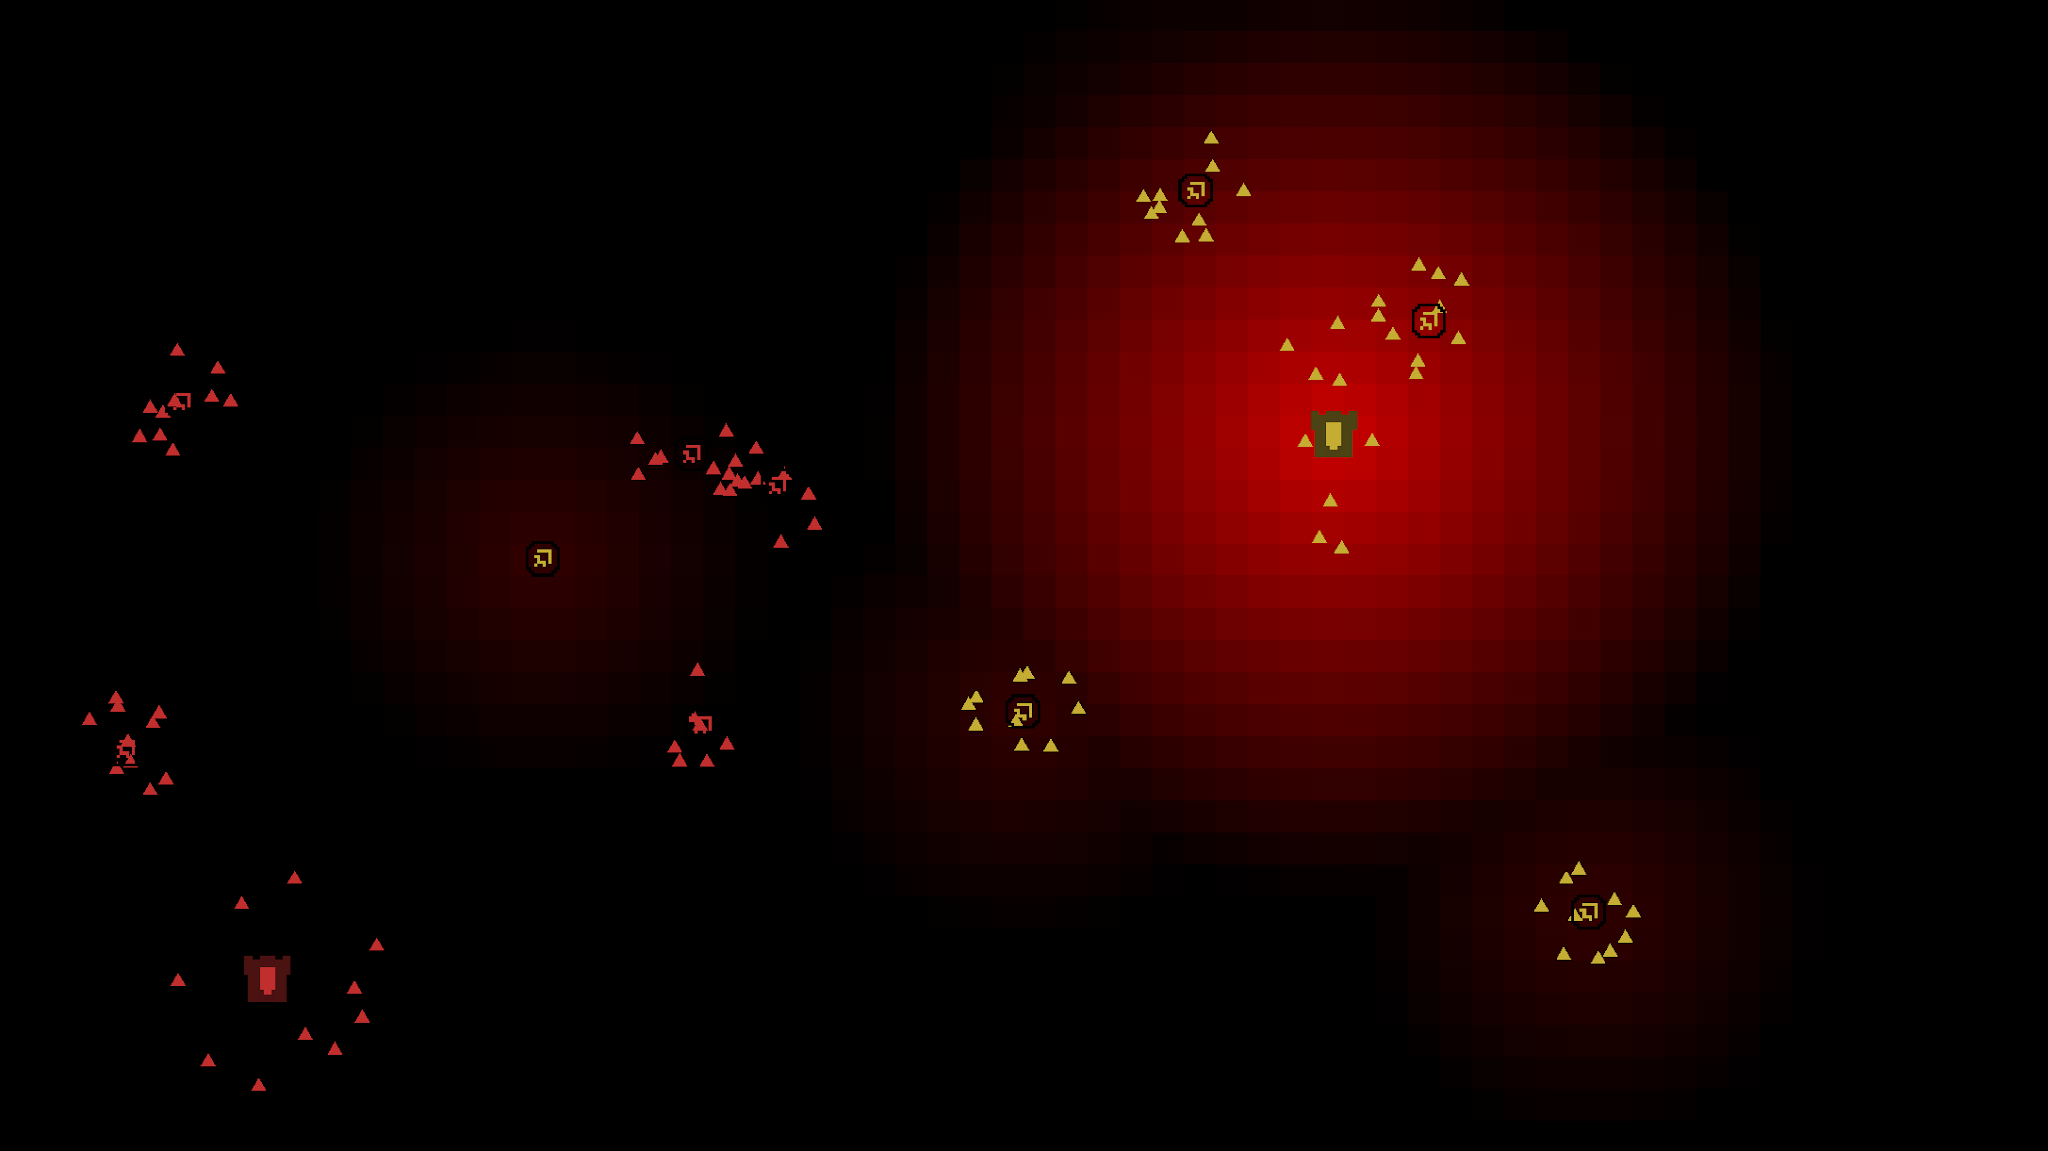 |
| Team 2 Heat Map (Effects team 1) |
In order to make up for this, I took advantage of the computational time that was freed up with my flowfield to add some complexity to my AI. I say complexity but it's not terribly complex in the end, they basically just move towards their target until they "spot" an enemy, after that, they check the influence maps to determine whether or not they have a "fighting advantage" if they do their combat effectiveness is increased and they have a better chance of killing their enemy => surviving (yay!).
the "equation" for determining their "fighting advantage"
advantage = friendlyHeatMapValue - EnemyHeatMapValue
Using this I was able to assign the units an "accuracy" based on whether or not the value was positive, negative, or neutral. One thing I could have also done was create a dynamic heat map based on not just the location of static towers but also the dynamic locations of the units themselves. I didn't do this in the end because of the way I was calculating my flowfield/creating my heat maps, but it could have added an extra layer of information that I could have used to influence my AI
(EDIT)
I forgot to mention that the Castle/tower things have different heat values and radii than the camps and towers can spawn more units at a greater range than the camps.
Part 4 - FIN (the end)
I hope that this blog post was able to give some insight into influence maps, I really enjoy not just learning about these various techniques for creating game AI but also gaining some insight into them based on my implementations of each one, and I find that putting them into posts/justifying my actions helps me solidify my understanding of them (to me at least, I don't know what you are able to take away from it). Once again comment below with any questions and I'll try to update the post if I learn anything new/nifty.
Until next time,
Written by Adam Currier
4/6/21


Comments
Post a Comment